When cold fronts sweep through Arizona, Texas, Florida, and other Sun Belt states, homes built primarily for heat management suddenly become uncomfortably chilly. Keeping your Sun Belt home comfortable during these temperature drops requires proper maintenance like Mason Chimney Repair along with simple insulation improvements, heating system optimization, and strategic use of solar energy timing to reduce costs while staying warm.
Sun Belt construction standards prioritize ventilation and cooling over insulation and heat retention. Single-pane windows, minimal attic insulation, and concrete slab foundations that work beautifully in summer become thermal liabilities when overnight temperatures plunge into the 30s and 40s. Many homeowners discover their HVAC systems struggle to maintain 68 degrees, or their energy bills spike dramatically during brief cold snaps.
The good news is that you don’t need expensive renovations to dramatically improve winter comfort. Weather-stripping doors, adding thermal curtains, sealing air leaks around windows, and adjusting your thermostat schedule to align with solar production hours can make a 10 to 15 degree difference in perceived warmth. If you have a fireplace, ensuring it’s properly maintained prevents cold drafts and provides supplemental heating during cold snaps.
This guide walks through the specific materials you’ll need, safety considerations for Sun Belt homes where heating systems sit unused most of the year, and a step-by-step implementation process that takes one weekend to complete. You’ll also learn how to verify your improvements are working and coordinate heating cycles with your solar panels if you have them. The result is a warmer home that doesn’t punish your wallet or contradict your commitment to energy efficiency.
Understanding Sun Belt Winter Challenges
Sun Belt homes weren’t built for cold weather. Construction standards in Arizona and similar desert climates prioritize keeping heat out, not holding it in. When overnight temperatures drop into the 30s or 40s, common during December and January in Phoenix, these homes lose warmth rapidly through structural features that work against comfort.
Insulation levels tell the story. Most Sun Belt homes built before 2000 have minimal wall insulation, often just R-11 or less, compared to R-19 or higher in colder climates. Attics may have some insulation, but it’s usually insufficient for heating season. Single-pane windows, still common in older neighborhoods, conduct heat straight through the glass. During a cold snap, you’ll feel drafts around window frames even when they’re closed.
Slab foundations create a different problem. Unlike homes with crawl spaces or basements in cooler regions, Arizona homes sit directly on concrete slabs that act as giant heat sinks. When desert soil cools at night, that cold radiates up through the floor. Walking barefoot becomes uncomfortable, and the HVAC system works overtime trying to compensate for this continuous heat loss from below.
Your heating system faces an uphill battle too. Most Sun Belt HVAC units are sized and configured for cooling loads. The heating component is often underpowered, struggling to maintain 68°F inside when it’s 35°F outside. Heat pumps, common in this region, lose efficiency as outdoor temperatures drop, sometimes switching to expensive auxiliary electric heat.
Thermal mass behaves differently in desert climates. In moderate climates, materials like brick and concrete absorb daytime heat and release it slowly at night. In the Sun Belt, the same materials absorb intense daytime warmth but radiate it back out through poorly insulated walls when temperatures plunge after sunset. The 40-degree temperature swings between day and night work against you, creating comfort challenges that temperate climates don’t face.
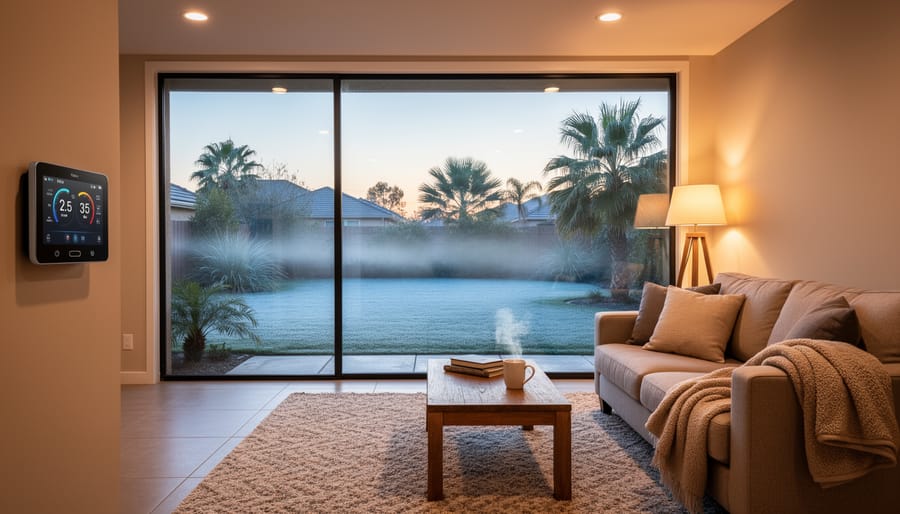
What You’ll Need to Winterize Your Home
Winterizing a Sun Belt home doesn’t require a major renovation budget or specialized contractor skills. Most materials are available at local hardware stores like Home Depot, Lowe’s, or Ace Hardware throughout Arizona, with many items costing less than you might expect.
Essential Materials and Tools:
- Weatherstripping and door sweeps ($15, $30 for multiple doors and windows)
- Caulk and caulking gun for sealing gaps ($8, $15)
- Thermal or blackout curtains ($20, $50 per window, depending on size)
- HVAC filters appropriate for your system ($10, $25 for quality filters)
- Foam insulation tape for outlets and switches ($5, $10)
- Pipe insulation sleeves for exposed plumbing ($3, $8 per section)
- Basic hand tools: screwdriver, utility knife, measuring tape (often already owned)
Optional Upgrades:
- Programmable or smart thermostat ($50, $250, depending on features)
- Cellular or honeycomb shades for superior insulation ($40, $100 per window)
- Reflective window film for dual-season efficiency ($20, $40 per roll)
- Portable electric space heater with safety shutoff ($30, $80)
- Smart energy monitoring plugs to track heating costs ($15, $35 each)
- Attic insulation batts or rolls if current R-value is insufficient ($40, $80 for 100 square feet)
For homeowners with solar installations, integrating your existing monitoring system helps you track how winter heating affects energy consumption and identify opportunities to save energy in winter by aligning heating schedules with peak solar production hours.
Total basic winterization typically runs $100, $200 for an average home, while comprehensive upgrades including a smart thermostat and complete window treatments might reach $500, $800. Many Arizona utilities offer rebates on thermostats and energy-efficient improvements, so check with your provider before purchasing.
Safety Precautions Before You Begin
Before you start winterizing your Sun Belt home, understand that even simple comfort improvements can create serious hazards if done incorrectly. Space heaters are a leading cause of residential fires in Arizona during cold snaps, especially when plugged into overloaded circuits or extension cords. Always plug space heaters directly into wall outlets, never into power strips, and ensure they’re on dedicated circuits rated for the wattage. Keep heaters at least three feet from curtains, furniture, and any flammable materials, and never leave them running when you’re asleep or away from home.
Carbon monoxide poisoning becomes a concern when homeowners turn to alternative heating sources unfamiliar in desert climates. Never use propane camping heaters, charcoal grills, or gas stoves for supplemental heat indoors, as they produce deadly carbon monoxide that accumulates quickly in enclosed spaces. If you’re using a fireplace for the first time in years, have the chimney inspected and cleaned first, creosote buildup and animal nests create chimney fire risks.
When adding insulation around electrical fixtures, light cans, or junction boxes, maintain the required clearance distances specified by manufacturer labels. Covering recessed lighting with insulation can cause overheating and electrical fires. If you’re uncertain about clearances or notice flickering lights, scorch marks, or warm outlets, stop work immediately and call a licensed electrician. Desert homes often have unique electrical configurations, and professional assessment costs far less than fire damage or injury.
Step-by-Step Winterization Process
Seal Air Leaks and Drafts
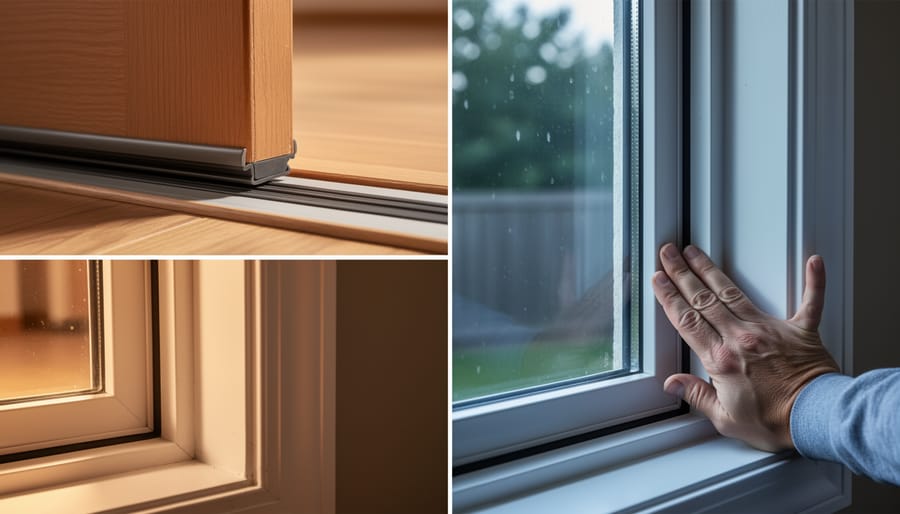
Start on a cool morning when temperature differences make air leaks obvious. Hold a lit incense stick or damp hand near window frames, door edges, and baseboards, you’ll feel drafts or see smoke pulled toward gaps. Check electrical outlets on exterior walls and anywhere pipes enter the house; these often have surprising openings.
For windows and doors, clean surfaces thoroughly before applying adhesive-backed weatherstripping. Desert dust interferes with adhesion, so wipe with rubbing alcohol and let dry. V-strip or foam tape works well for window sashes, while door sweeps seal gaps at thresholds. Press firmly and give adhesives 24 hours to cure in Arizona’s low humidity.
Use acrylic latex caulk for gaps around window trim and door frames, it remains flexible as materials expand and contract with temperature swings. Silicone works better for exterior penetrations where pipes or cables enter. Apply in thin, smooth beads rather than thick globs. Tool with a wet finger for clean lines.
Seal outlets with foam gaskets behind cover plates. For larger gaps around pipes under sinks, stuff with copper mesh before caulking, it blocks air without trapping moisture. Work systematically through each room rather than jumping around. These simple fixes typically reduce heating needs by 10 to 15 percent.
Optimize Your HVAC System
Start by locating your HVAC system’s thermostat and switching it from cooling to heating mode, most units have a simple toggle or digital setting. Set the temperature to 68°F during waking hours and 62-65°F at night to balance comfort with efficiency.
Replace your air filter immediately if you haven’t done so in the past three months. Dirty filters force your system to work harder and waste energy. Check the filter size on your existing one and buy replacements rated MERV 8-11 for desert dust conditions.
Walk through each room and reverse your ceiling fans to spin clockwise at low speed. This pushes warm air down from the ceiling where it naturally rises, distributing heat more evenly without creating a wind-chill effect.
If you have solar panels, program your thermostat to pre-heat your home between 10 AM and 3 PM when your panels generate peak power. Set the temperature 2-3 degrees higher during this window, then let it coast through the evening on stored thermal mass. This reduces grid electricity use during expensive peak-rate hours and maximizes your solar investment during shorter winter days.
Add Thermal Window Treatments
Thermal window treatments create an insulating air barrier that dramatically reduces heat loss through glass, your home’s weakest thermal point. Cellular (honeycomb) shades trap air in their pockets and offer the best insulation value, while thermal-backed curtains provide a more affordable alternative.
Measure your windows carefully before purchasing, then mount hardware inside the frame for maximum coverage or outside for a cleaner look. Most treatments install with basic brackets and require only a drill and level.
Here’s the strategic part: open south-facing treatments during daylight hours to capture free solar heat warming your floors and walls. Close all window coverings at dusk to trap that warmth inside, this timing matters more than the treatment type. North-facing windows should stay covered throughout cold days since they lose more heat than they gain.
For rooms you’re not using, keep treatments closed around the clock to create buffer zones that reduce heating demands elsewhere.
Insulate Vulnerable Areas
Start with the attic, where most heat escapes. If your attic hatch lacks insulation, cut rigid foam board to size and attach it to the back of the door with construction adhesive. Add weatherstripping around the frame to seal gaps. For the attic floor itself, blown-in cellulose insulation works well in Arizona’s dry climate and you can rent the equipment from home improvement stores for a day. Aim for R-30 to R-38 coverage.
Garage doors lose significant heat, especially if your garage connects to living spaces. Insulation kits designed for garage doors install easily with adhesive panels that fit between door ribs. These typically cost $50, $100 and make a noticeable difference in attached garage temperatures.
Water heaters benefit from insulating blankets, available at hardware stores for around $20. Wrap the tank according to manufacturer instructions, leaving controls and the top exposed. Insulate the first six feet of hot water pipes leaving the heater using pre-slit foam pipe insulation secured with zip ties.
Leverage Solar Energy and Battery Storage
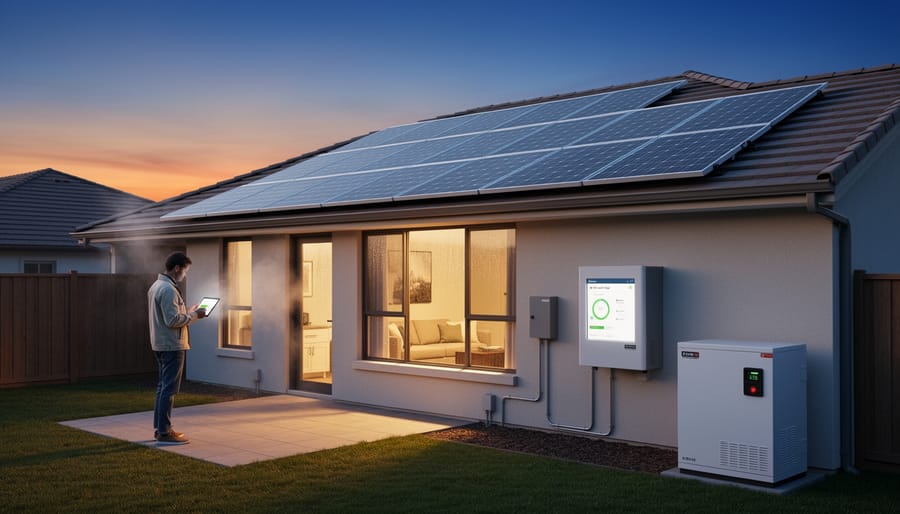
If you have solar panels and battery storage, you can dramatically improve winter comfort while cutting heating costs. The key is timing your energy use to match production patterns.
Winter brings shorter days and lower sun angles, but Arizona still delivers strong midday solar output. Here’s how to optimize solar for home heating efficiency:
- Set your thermostat 2-3 degrees higher between 10 AM and 3 PM when panels produce peak power, pre-heating your home’s thermal mass.
- Program your battery system to store excess midday generation rather than sending it back to the grid.
- Schedule the thermostat to drop to your comfort temperature by 4 PM, letting stored heat carry you into evening.
- Use battery power for heating from 5-9 PM during utility rate peaks, avoiding expensive grid electricity.
- Monitor your energy app weekly to fine-tune heating schedules based on actual production and consumption patterns.
This approach shifts heating demand to when your system generates free electricity. Most battery systems can store 10-13 kWh, enough to run a heat pump for several evening hours. The thermal mass in your walls and floors acts like a secondary battery, holding daytime heat well into the night.
Track your results through your solar monitoring app. You should see reduced grid draws during evening peaks and lower monthly bills, even during cold snaps.
How to Verify Your Home Is Winter-Ready
After implementing your winterization steps, you need to confirm they’re actually working. Start by monitoring indoor temperatures across different rooms using a simple thermometer or your thermostat’s app. Move through your home during the coldest part of the day and evening, you shouldn’t feel significant temperature differences between rooms or cold drafts near windows and doors.
Check these indicators to verify your home is ready:
- Temperature variations between rooms stay within 3-5 degrees, not 10-15 degrees
- No cold air movement detected when you hold your hand near sealed windows and doors
- HVAC system cycles less frequently and maintains set temperature consistently
- Utility bills show 10-20% reduction compared to previous winter months with similar temperatures
- Rooms feel comfortable without layering extra clothing indoors
For a more detailed assessment, download a thermal imaging app for your smartphone or borrow an infrared thermometer from a local library’s tool lending program. Scan exterior walls, windows, and ceiling areas on a cold morning, temperature readings should be relatively uniform, without dramatic cold spots indicating heat loss.
If you have solar panels, review your energy monitoring system to confirm heating loads align with peak production hours. Proper winterization means your home retains heat efficiently enough that you’re not drawing excessive power after sunset. Understanding panel placement tips can help optimize winter production for heating needs.
Persistent cold spots, bills that haven’t improved, or rooms that never warm up signal you need additional insulation or professional HVAC service.
When to Call a Professional
Some winter comfort improvements hit a wall where DIY ends and professional expertise begins. If your HVAC system won’t switch to heating mode, makes unusual noises, or produces weak airflow, call a licensed technician before forcing adjustments. These systems weren’t designed for heavy heating loads in Sun Belt climates, and misdiagnosis costs more than proper service.
Major insulation projects involving attic spaces require professionals who understand Arizona building codes and fire safety requirements around recessed lighting. Similarly, any electrical work for dedicated heating circuits or upgraded thermostats demands a licensed electrician to prevent fire hazards.
Homeowners with solar installations should consult their provider before adding heating equipment that might overload the system. Professionals can assess whether your panels generate sufficient winter output, advise on battery storage capacity for evening heating needs, and help you keep snow off panels during rare weather events.
Arizona Public Service and Salt River Project both offer free or subsidized home energy audits through their residential programs. These assessments identify specific comfort issues and often connect homeowners with rebates for qualified improvements, making professional upgrades more accessible across the community.
Common Questions About Winter Comfort in the Sun Belt
Most Sun Belt homeowners share similar concerns when preparing for winter temperature drops. Here’s what you need to know about the most common questions we hear from Arizona residents.
How cold is too cold for a minimally insulated home?
When nighttime temperatures consistently drop below 40°F, minimal insulation becomes a comfort and efficiency problem. You’ll notice drafts, uneven heating, and higher energy bills as your HVAC system struggles to maintain warmth.
Can solar panels generate enough power during winter months?
Yes, solar panels actually perform more efficiently in cooler temperatures, and Arizona still gets excellent sun exposure in winter. While days are shorter, you’ll typically see 70-80% of your summer production, which is sufficient for heating needs if you optimize usage timing.
Is insulation worth the investment if cold snaps only last a few weeks?
Absolutely, because proper insulation works year-round. The same measures that keep cold air out in winter prevent heat infiltration during summer, reducing your cooling costs for eight months of the year and delivering a better return on investment.
How do battery storage systems help during cold winter nights?
Battery systems store excess solar energy generated during sunny winter days and release it for heating after sunset. This means you can pre-heat your home during peak solar hours and maintain comfort through the night without drawing from the grid during expensive rate periods.
These questions reflect real challenges Sun Belt homeowners face. Winter comfort isn’t about extreme cold survival, it’s about maintaining efficiency in homes built for a different climate challenge. The solutions that work here differ from traditional cold-climate strategies, and understanding these distinctions helps you invest your time and money wisely.
Winterizing your Sun Belt home delivers benefits that extend far beyond your thermostat setting. When you seal drafts, optimize heating systems, and align energy use with solar production, you reduce waste that strains both your wallet and the electrical grid. During winter cold snaps, Arizona’s grid faces unexpected demand spikes as millions of homes simultaneously crank up heating systems designed primarily for cooling. Your efficiency improvements directly ease this pressure, contributing to a more stable energy supply for your entire community.
Homeowners with solar panels and battery storage systems amplify these benefits by storing daytime energy for evening heating needs, reducing reliance on fossil fuel power plants that typically ramp up during peak demand hours. Lower utility bills are the immediate reward, but the environmental impact compounds over time as efficient homes collectively decrease regional energy consumption.
View winter comfort preparation as one component of year-round energy stewardship rather than a seasonal inconvenience. The same attention to insulation, smart thermostats, and renewable energy integration that keeps you comfortable during brief cold snaps also improves summer cooling efficiency and supports Arizona’s transition toward cleaner energy sources. When individual households prioritize energy mindfulness, the cumulative effect strengthens community resilience and accelerates progress toward environmental sustainability goals that benefit everyone.